Cleaning Up Your Bits
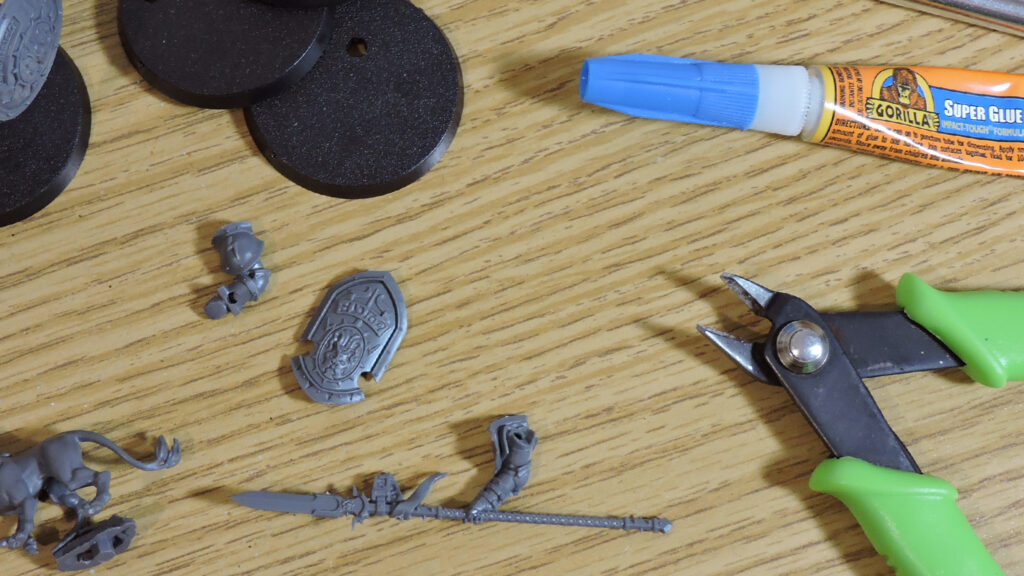
First things, First. You will need a good pair of snippers (AKA a precision side cutter or wire cutter). These are going to get a lot of use so I’d suggest getting a good pair that’s spring-loaded to save your wrist. Make sure you get one that’s a side cutter so you can make nice flush cuts.
Note: 3D Printed models do not require as much cleaning since they do not have mold lines. This section is more geared toward mold-casted models that need to be assembled.
Be sure to refer to any included directions before snipping your bits from the sprue (That’s the term for the plastic frame the bits are connected to). Each bit will have a number next to it on the sprue. These numbers are used for assembly. It may be tempting to ignore the directions, but I almost always check the directions just in case. There are often very similar pieces within kits and it can be easy to get bits mixed up if you aren’t careful. Or worse, you could assemble a model incorrectly! So use the directions and save yourself the headache. I have made this mistake far too many times.
Once your bits are cut out it’s time to clean up the mold lines. This is my least favorite part of the whole process. If you want to splurge, Citadel makes a great tool specifically for this. It’s a bit pricey, but does the job well. I find that an X-Acto Knife works just fine for removing mold lines, plus replacement blades are very cheap. Just lightly rake the blade across any mold lines you want to remove.
HauntsWargaming.com is supported by gamers like you. When you buy through links on this website, we may earn affiliate commission.
Assembly
Note: If you are planning to magnetize a model, It’s best to consider how the magnets will be attached before assembling the model.
Now for the fun part! Assembly is pretty straight forward. Just get yourself some superglue and start slapping those bits together! (Again, be sure to check the included directions to make sure you are assembling the model correctly!) Try to use as little superglue as possible and make sure you are doing this in a well ventilated area to avoid breathing in the fumes.
Using too much superglue can result in a chalky white texture. I suggest using a superglue dispenser with a fine-tipped applicator nozzle to avoid this. When working with super glue, the more control you have the better.
Magnetization
Some Hobby-masters like to magnetize their models. Usually this is done with models that have multiple weapons options so they can be switched out. But pretty much any part can be magnetized if you would like it to be. Each hobby kit is different so these are just some general guidelines. You will have to use your own judgement in most cases.
Note: Some kits are designed to be modular and don’t even need to be magnetized!
It’s nice to have a variety of Neodymium magnets on hand since each project is different. When I buy magnets for a project I like to get at least 20-100 of each size, depending on how frequently I think I will use them. (That way I have a nice collection of them for future projects!)
It’s also useful to have a hobby drill to create a clean hole to embed the magnets in. Most importantly, make sure you place the magnets facing the right direction so they attract each other, otherwise you may end up having to cut into the model to remove them.
When working with larger magnets it’s best to secure them in place in a way that they are not in direct contact with each other to avoid chipping the magnets. It may be a good idea to use spare sprue pieces or green stuff to help secure the magnet in place, though superglue is usually enough for smaller magnets.