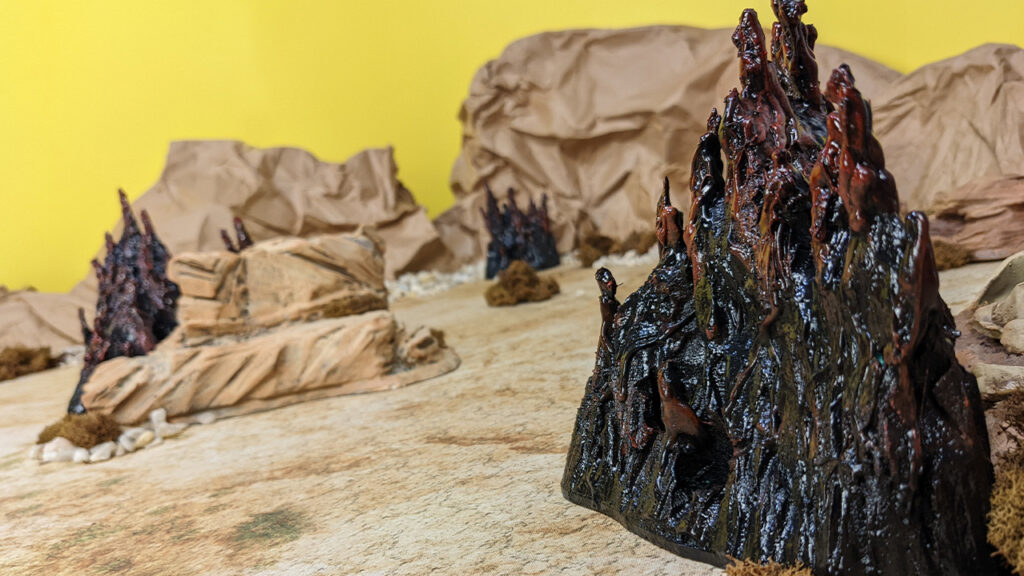
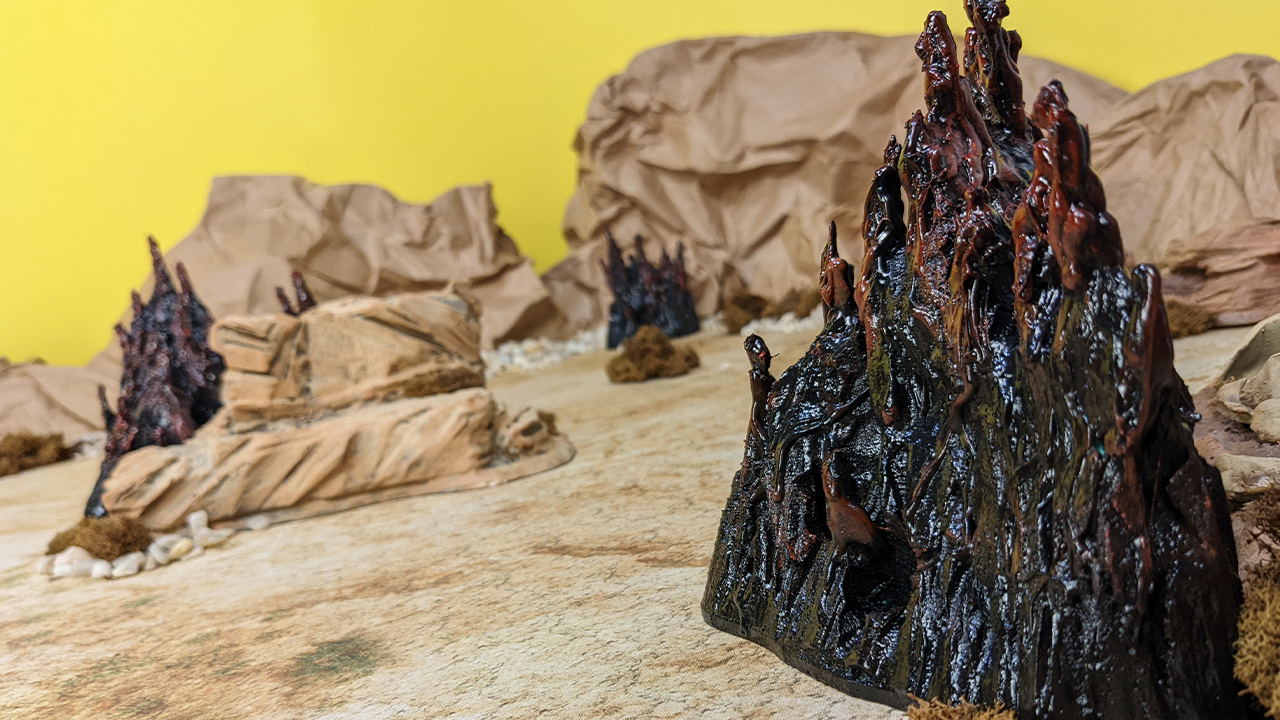
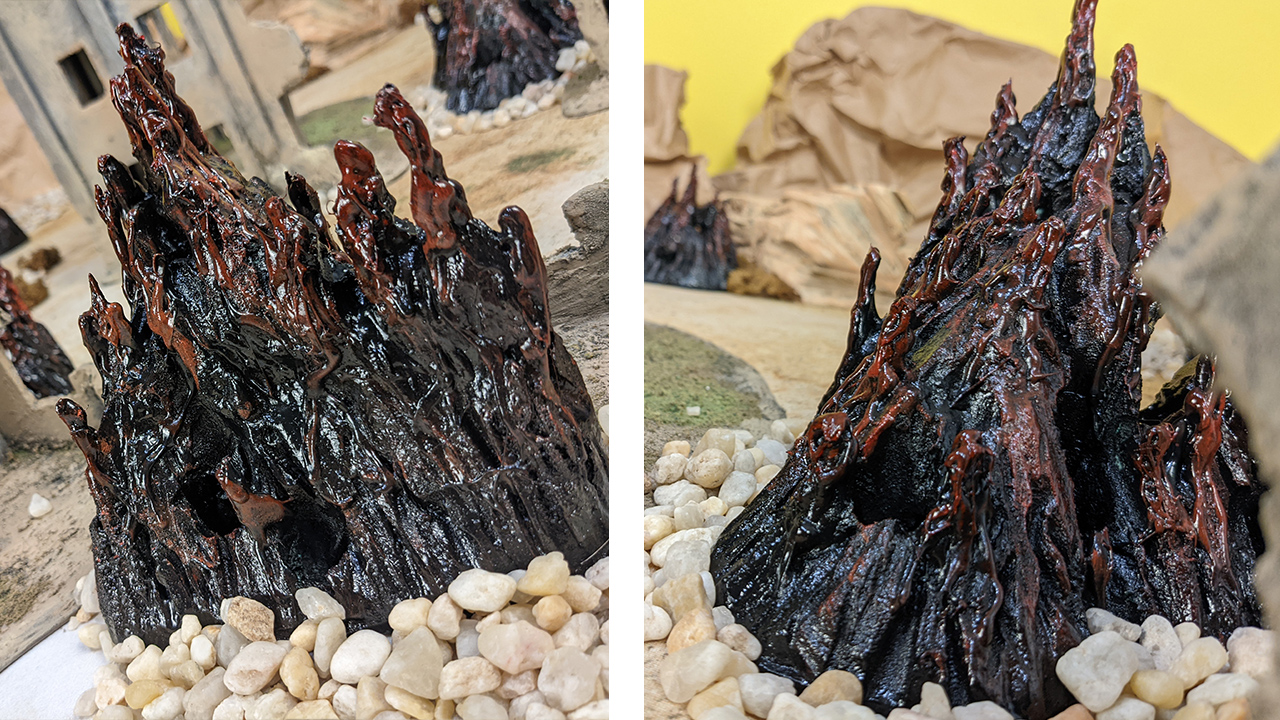
In this article I’m going to explain how I created Alien Hives terrain for games of Grimdark Future. I call these terrain pieces “Spore Mounds”.
Since there isn’t really a lot of lore baked into the Grimdark Future universe at the moment, I took the opportunity to start creating my own lore for my narrative campaigns. My idea was to create structures that kind of looked like termite mounds. I also took inspiration for these from the short film Rakka by Oats Studios. The alien race in that film uses this gravity defying black ooze to create everything they need, including buildings. It has a really creepy/cool look to it and I wanted to try and emulate that.
The Foundation
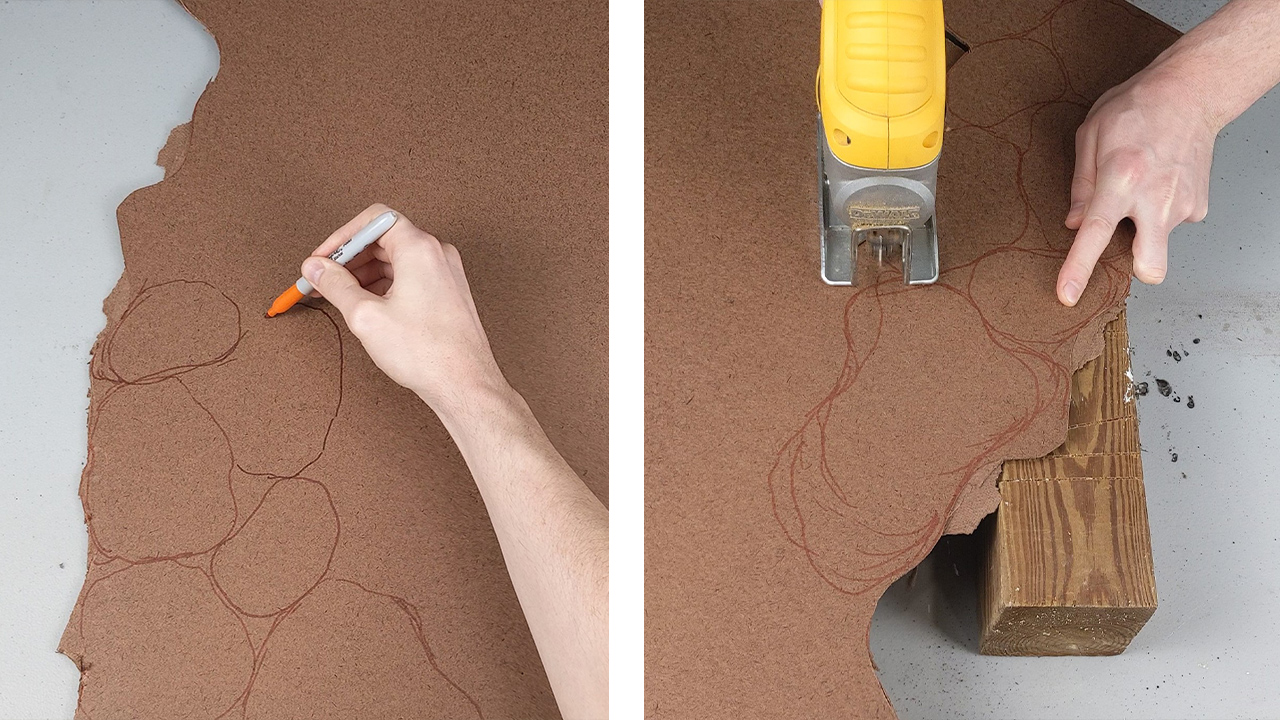
I used 1/4″ sheets of tempered hardboard for the foundation of these mounds. This tempered hardboard has a smooth side and a rough side. I face the rough side down because in theory it grips the battle map better.
I drew some circular shapes of various sizes on the board and cut them out with my jigsaw. When I’m using a jigsaw I always use 4x4s to support whatever I’m cutting and try to keep a 4×4 between the blade and my hand.
You can’t be too careful when using a jigsaw, in my opinion.
Layering the foamboard
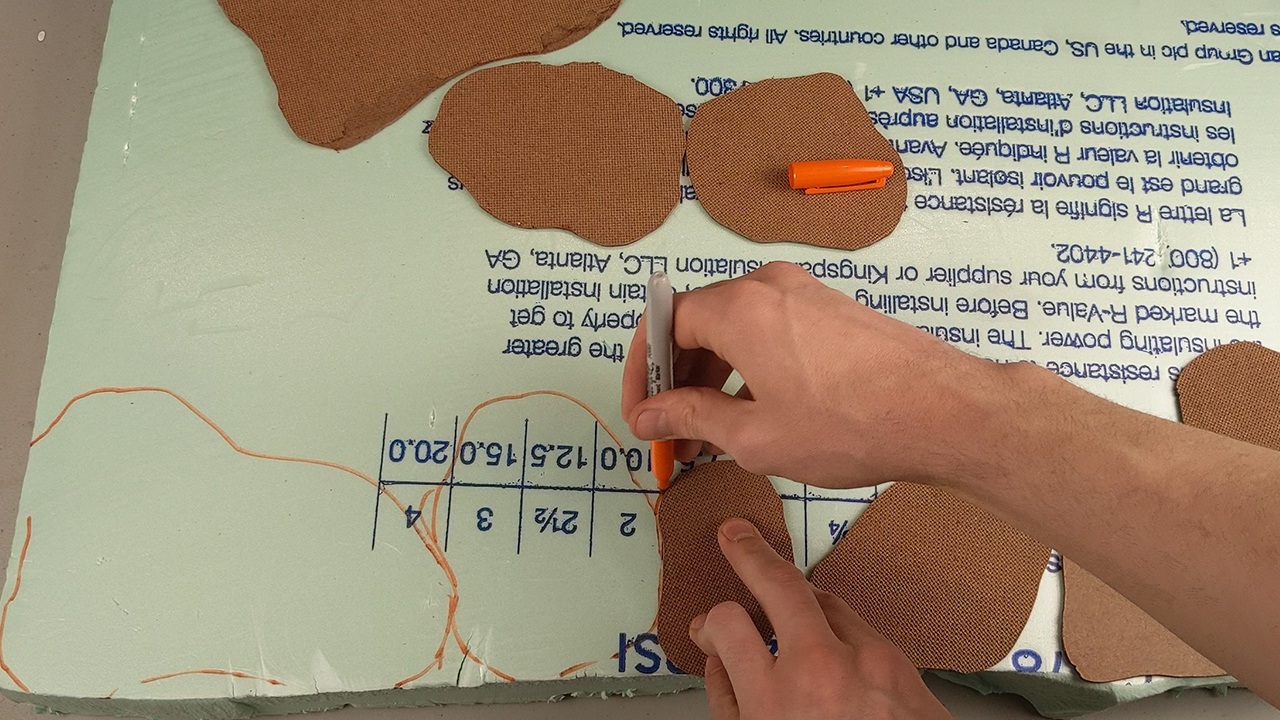
I then laid the hardboard, smooth side down, on top of a 2″ thick piece of foam board. I traced the perimeter each piece onto the foam with a sharpie.
Then, I used a hot wire cutter to cut them out. If you watch my video on this you’ll see I had some issues with the hotwire cutter not being able to cut deep enough. So I did use a knife for some portions.
You could use a knife for this project but it would be a lot harder to get the smooth cuts you can achieve with a hot wire cutter.
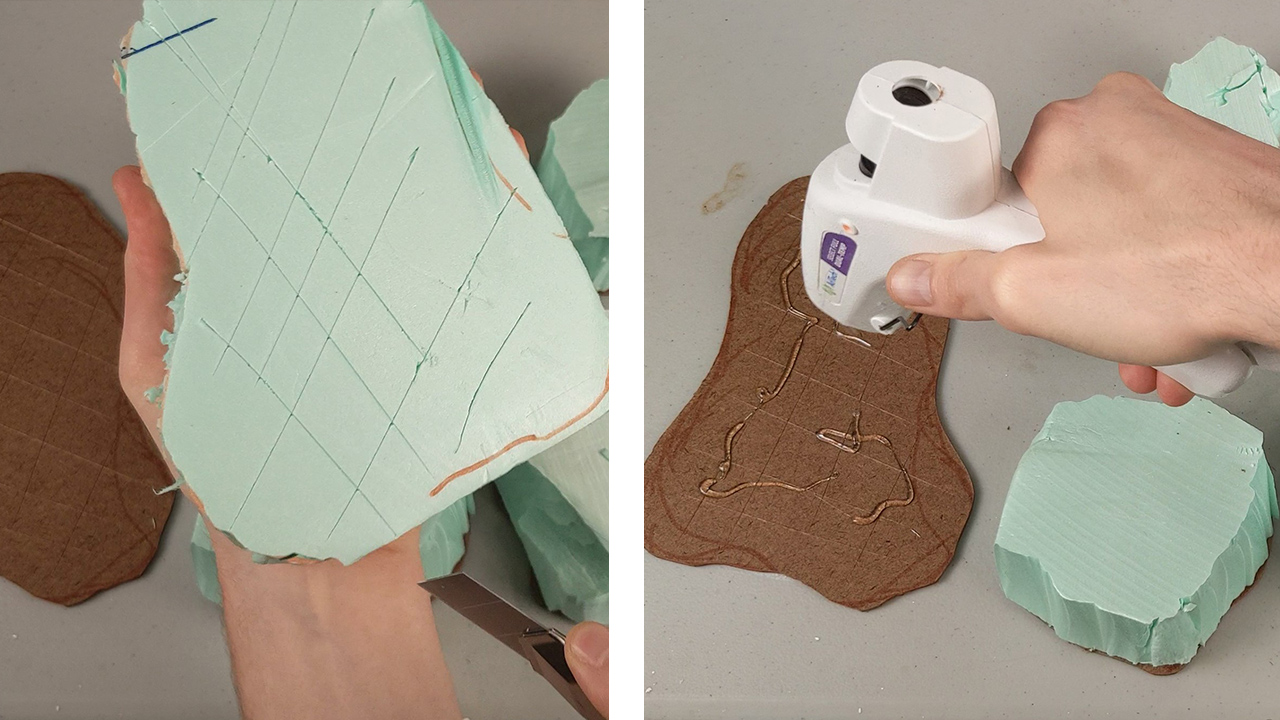
I scored the hardboard bases and foam in a crisscross pattern, then hot glued them together. The scoring helps create a stronger bond.
Note: I have my hot glue gun on its high setting for this.
Shaping the Mounds
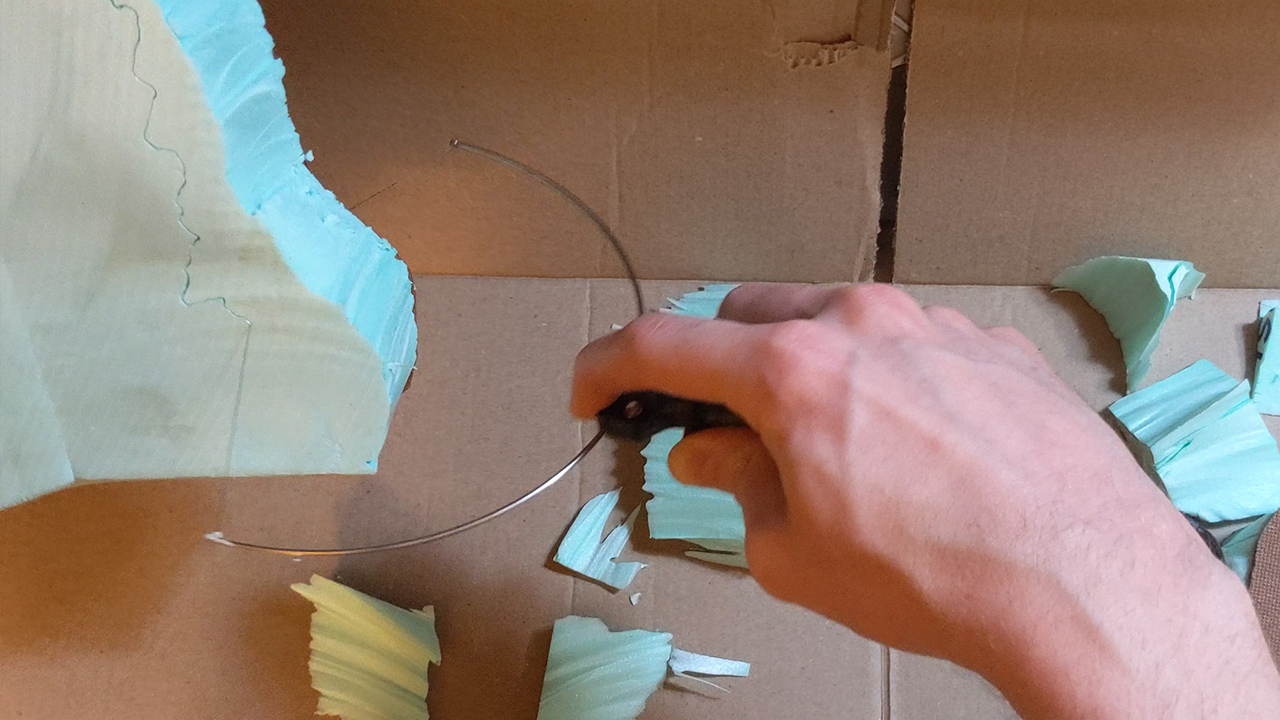
Using the hardboard as a guide for the hot wire cutter, I cut jagged angles around each mound. I wanted these to come to an off-center high point, so I cut steeper angles on one side of each node.
Make sure you are doing this in a well-ventilated area!!! I’m cutting these in my vent booth, but I still have a respirator on. This can put off a lot of nasty smoke that you do not want to breathe in.
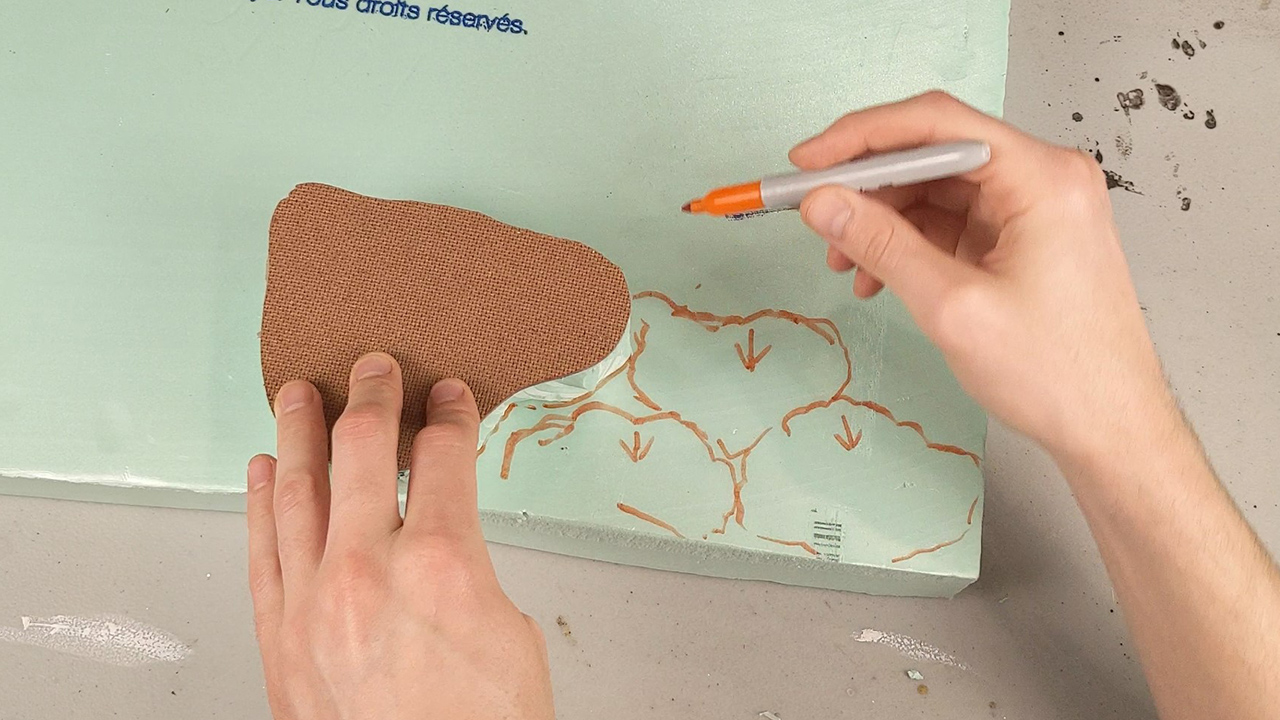
Once the first layer was done, I traced the perimeter of the tops onto foamboard again. This time I added some arrows so I knew, generally, what direction the cuts we’re going to be made. I was able to save a bit of foamboard by doing that, as some of the angled pieces overlapped each other.
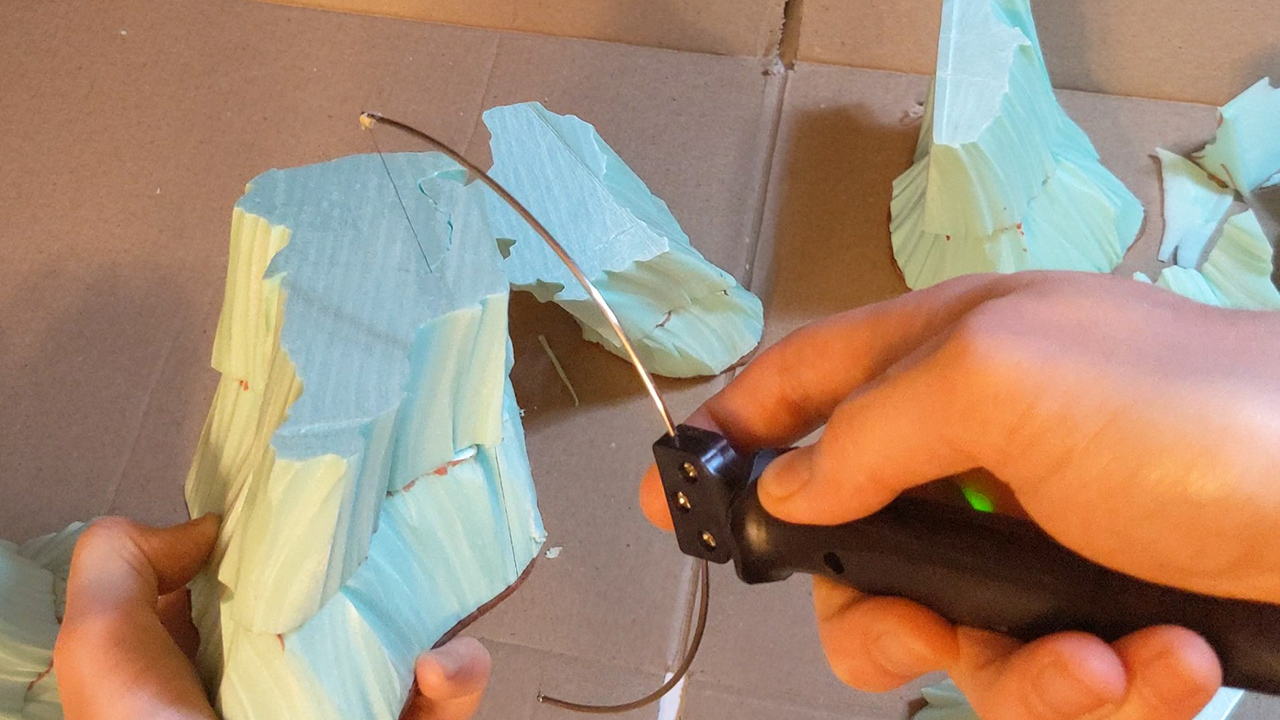
Then I repeated the previous steps: scoring the 2 pieces of foam, gluing them together and continuing the angular cuts with my hot wire cutter.
The nice thing about using hot glue for this is that the hot wire cutter can cut through it pretty easily.
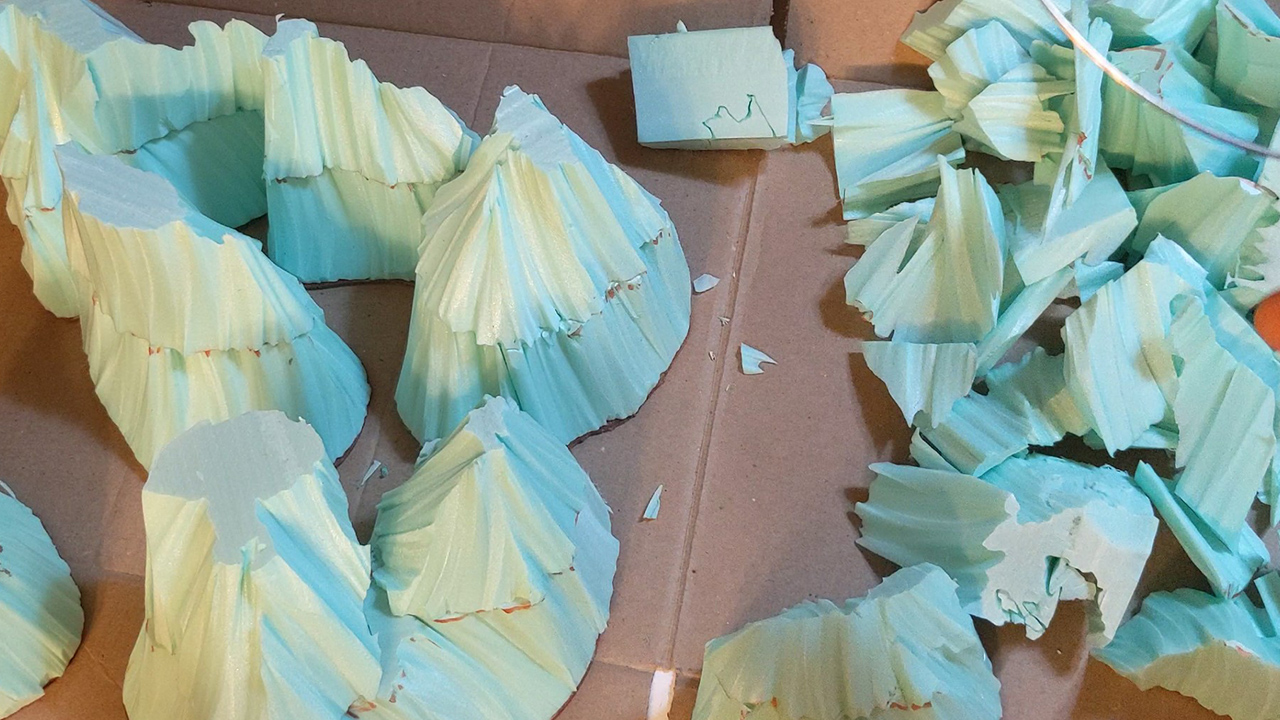
Some of the nodes needed a 3rd layer of foam.
Note: Save the foam scraps for future projects! If anything it makes great basing material. I try to avoid throwing this stuff away.
Hot Wire Sculpting
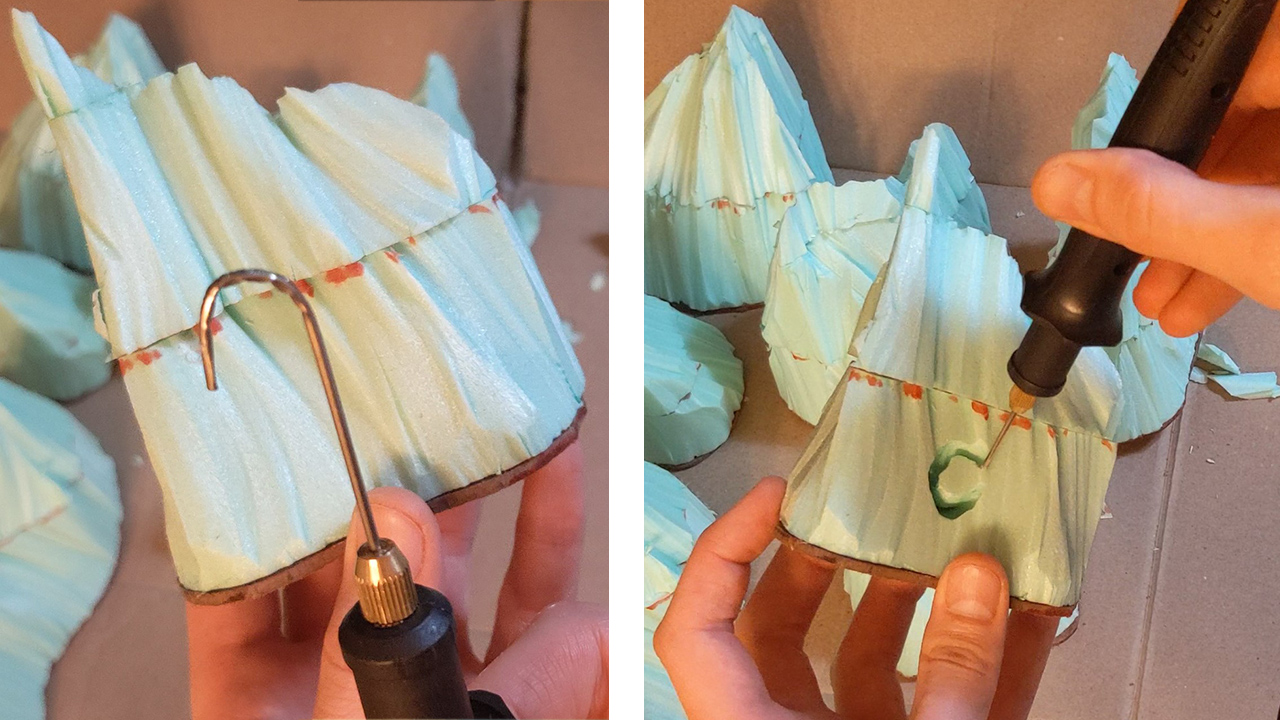
My hot wire cutter came with 2 engraving tips. I broke the first one trying to bend it into a hook shape. The second one was a success.
Some hot wire cutters come with hook attachments like this. Mine did not.
I made some plunge cuts using the hook. These are meant to be vent holes for vast underground hive networks. I cut a main hole near the peak of each node, then spaced the other holes out randomly, wherever they looked good to me.
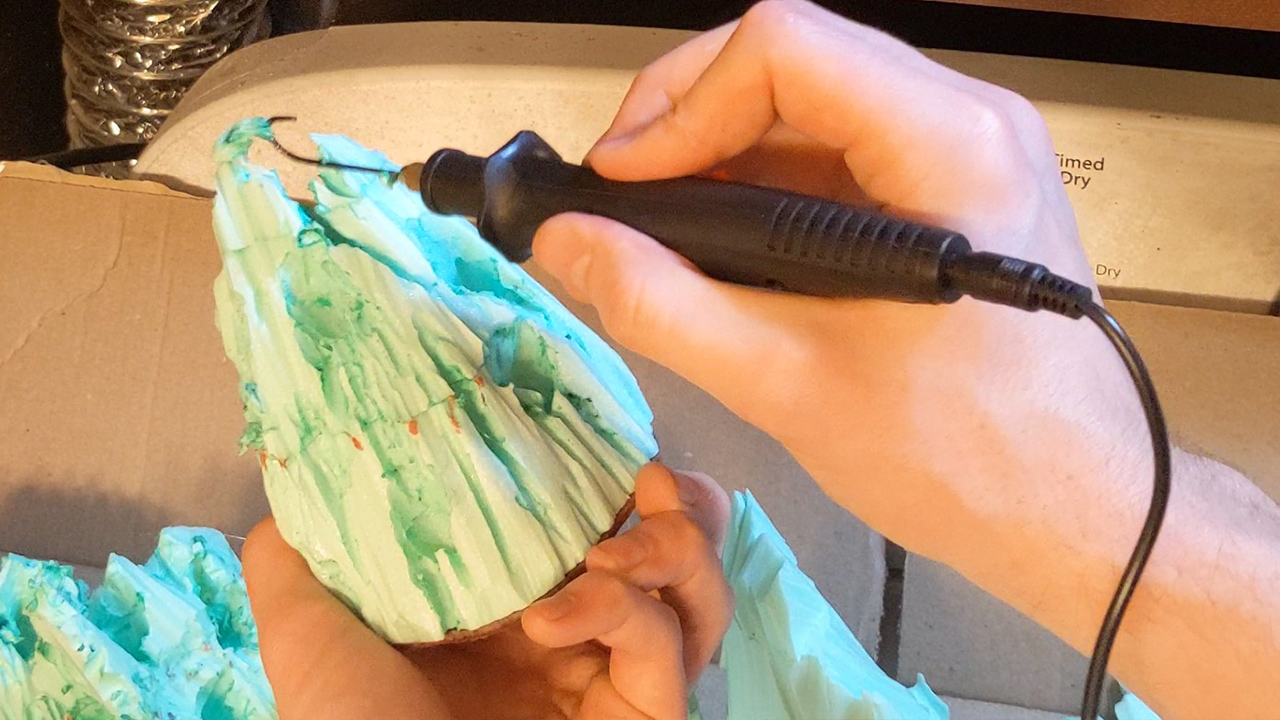
After that I used the hook attachment to melt some deep gashes into each node. The foam can get pretty hot when you do this so give it at least a minute to cool down before touching it.
Melting foam like this can also make it kind of sharp in certain spots so I used my multitool to fish out some of the fiddly bits in the holes.
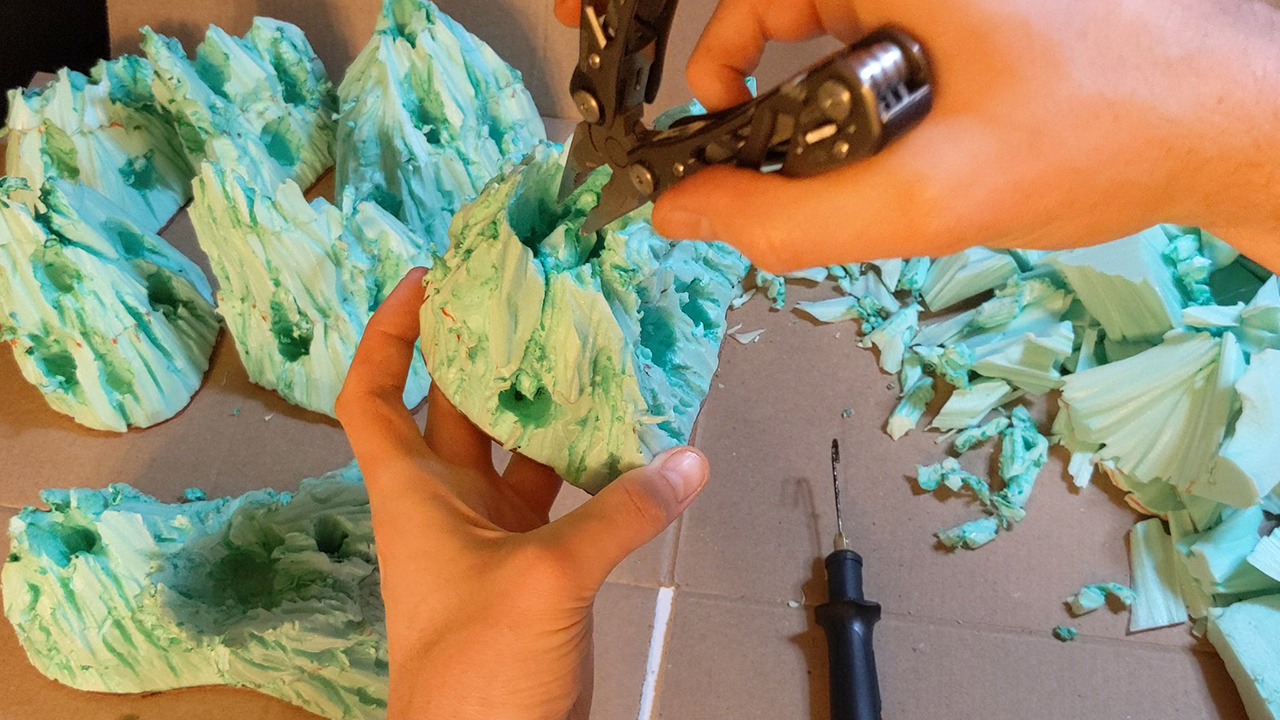
When I was happy with the sculpting, I brushed each node with a wire brush to add some grit.
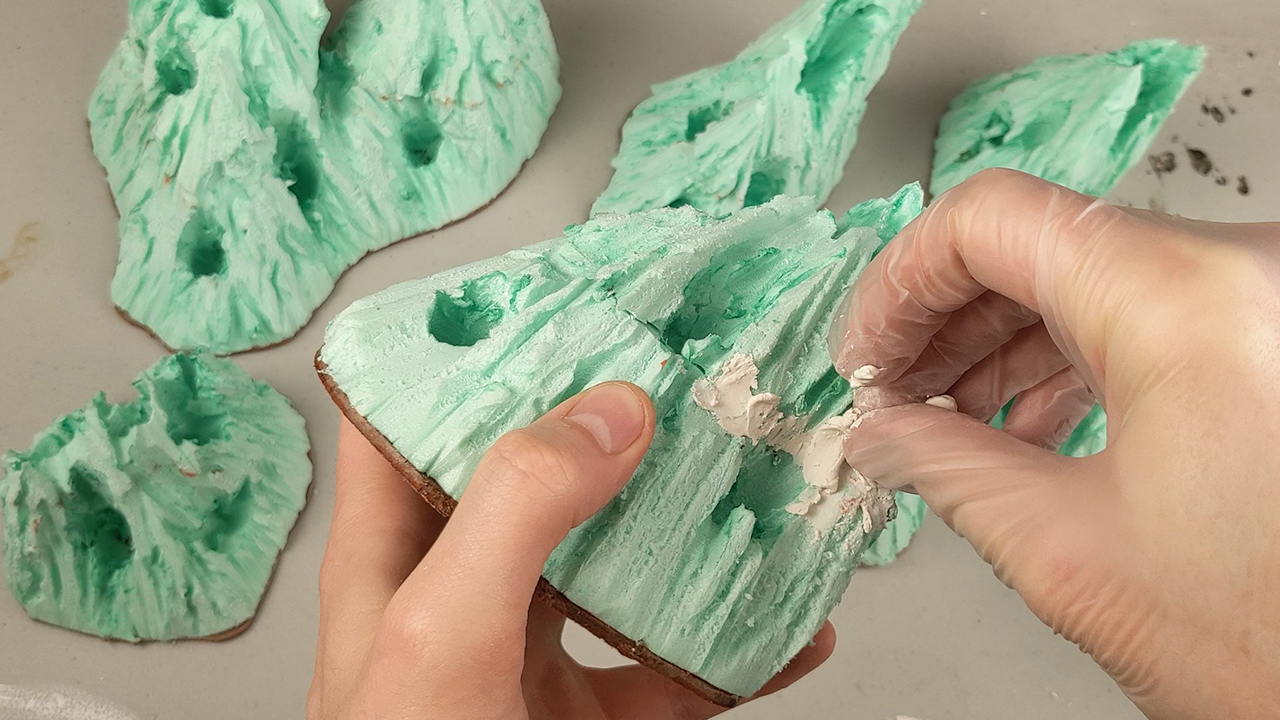
If you follow the last few steps strategically you can hide most of the gaps in the foam. I used a bit of spackling to fill any remaining gaps.
You could skip this step
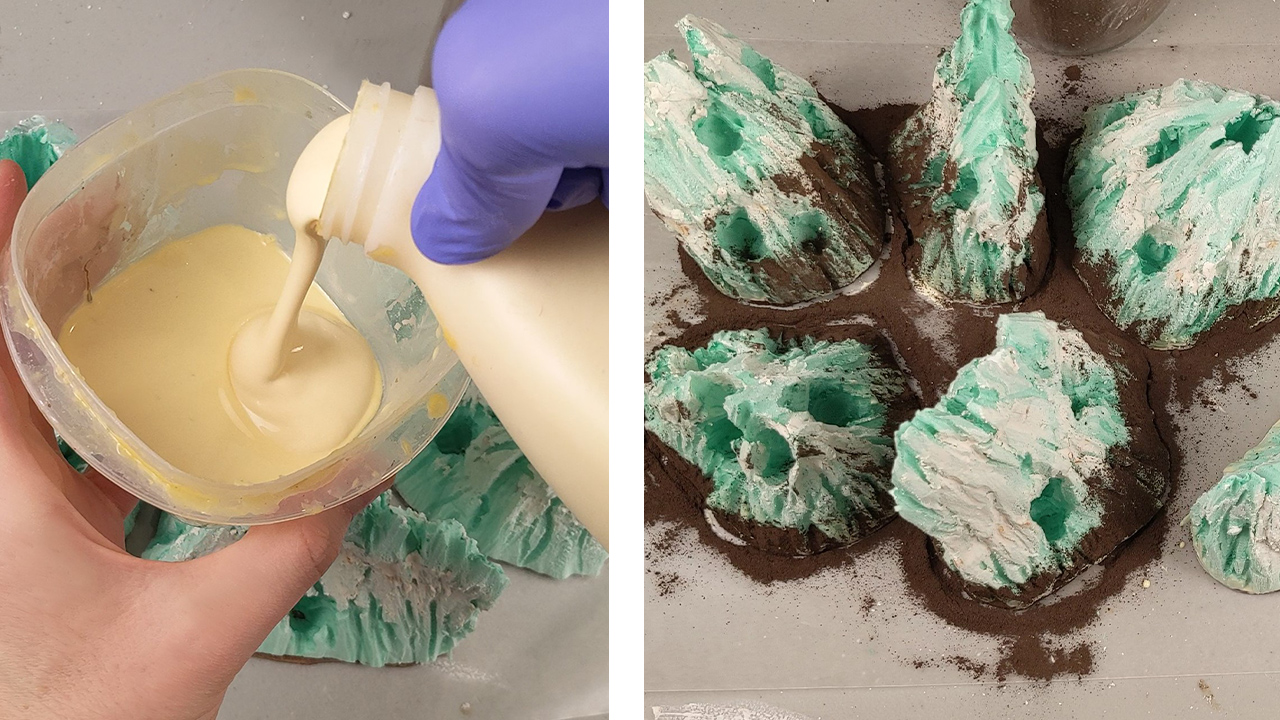
At this point, I laid the mounds on a sheet of wax paper, smeared wood glue around the bottom inch of each node and sprinkled grout on top of that.
In hindsight, I should’ve done this AFTER applying the hot glue in the next step. I would suggest doing that, or just not even applying grout at all. (Grout makes a mess) It was kind of an unnecessary step! I was trying to blend the hardboard in with the foam.
Gravity-Defying Ooze Effects
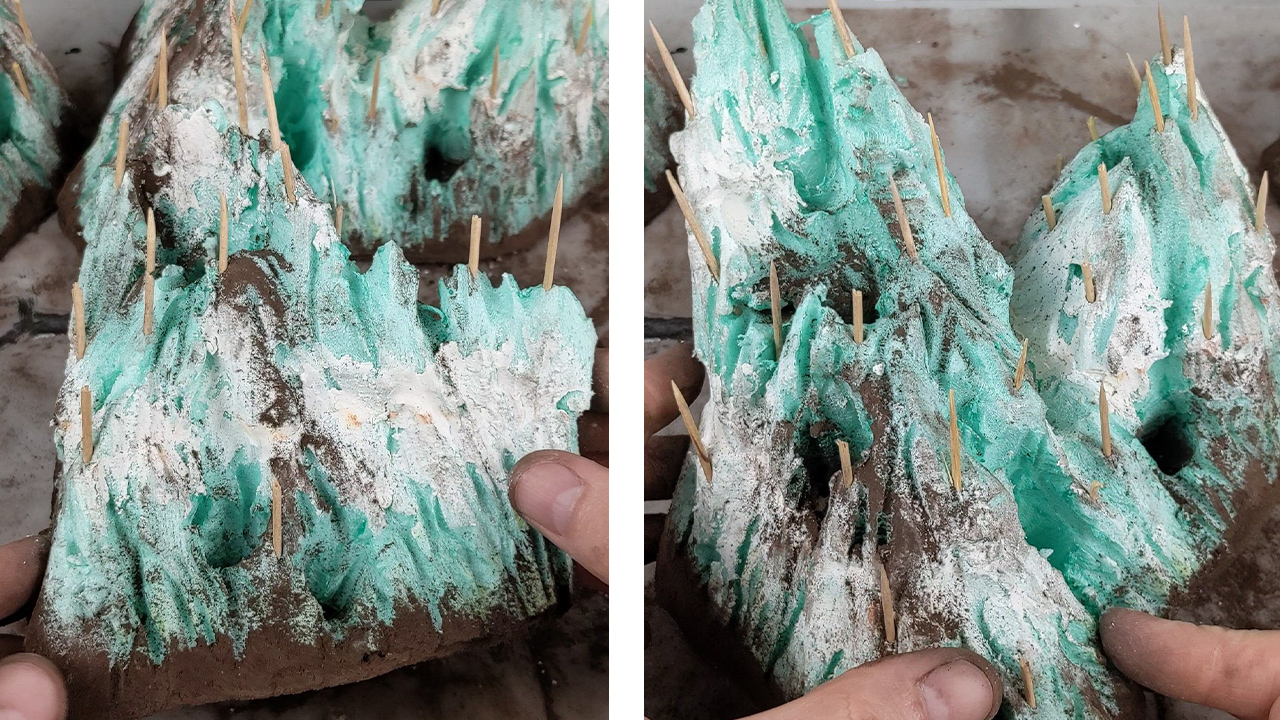
Anyway, after that, I stabbed tooth picks into each mound. I started by surrounding the holes with toothpicks to create a maw-like look. Next, I added toothpicks randomly, wherever it seemed like there would be an ooze spire.
Note: You can add a lot of support to the thinner pieces of foam with toothpicks here.
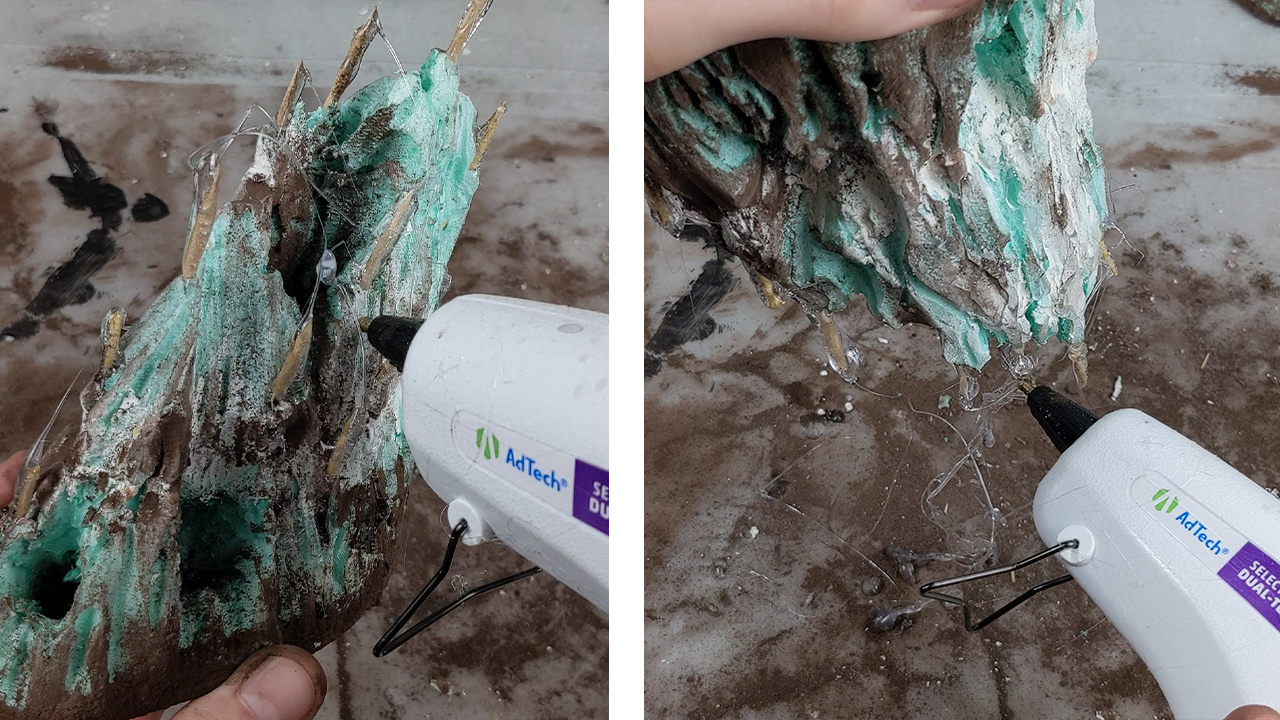
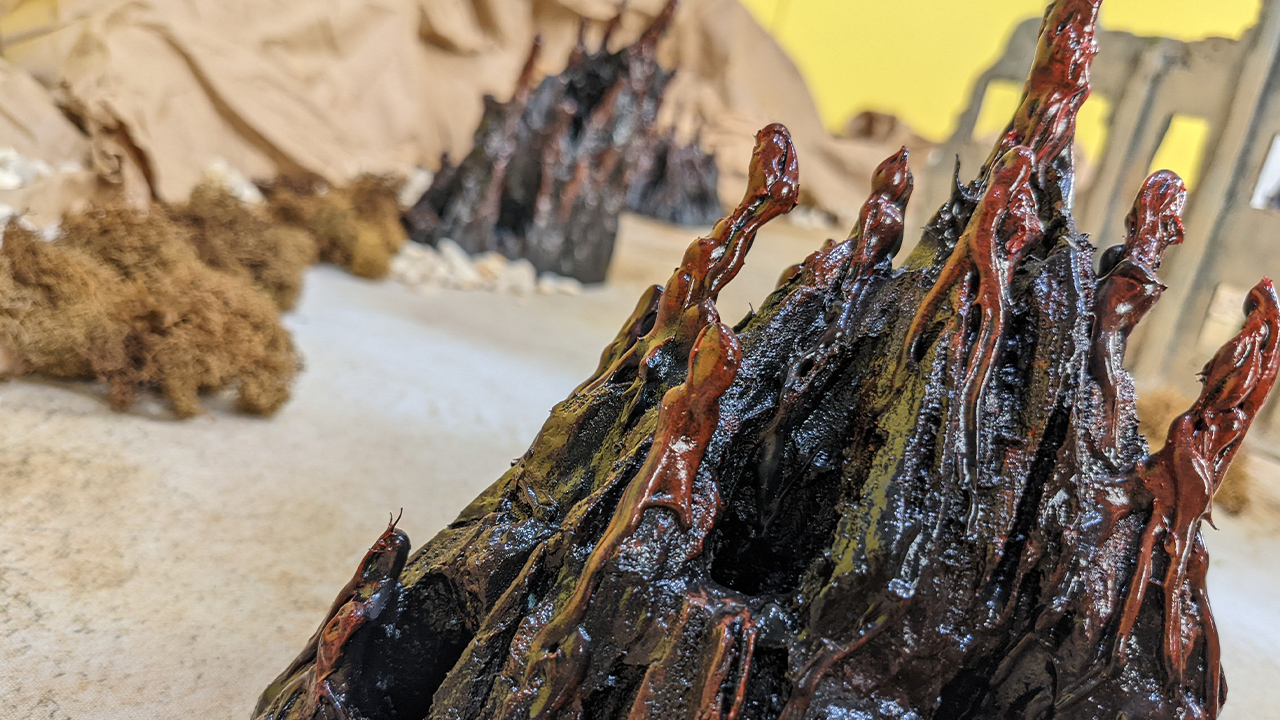
Now for the tricky part. I layered hot glue onto the tooth picks, turning the nodes upside down periodically so the hot glue would appear to flow upward. Don’t try and rush this. Just keep layering it on. The low setting on the hot glue gun works better for this.
I also added some hot glue “veins” on the sides of each mound, using random organic branch-like patterns.
I peeled off the hot glue strands once they cooled down. If done correctly, that just adds to the effect.
Painting
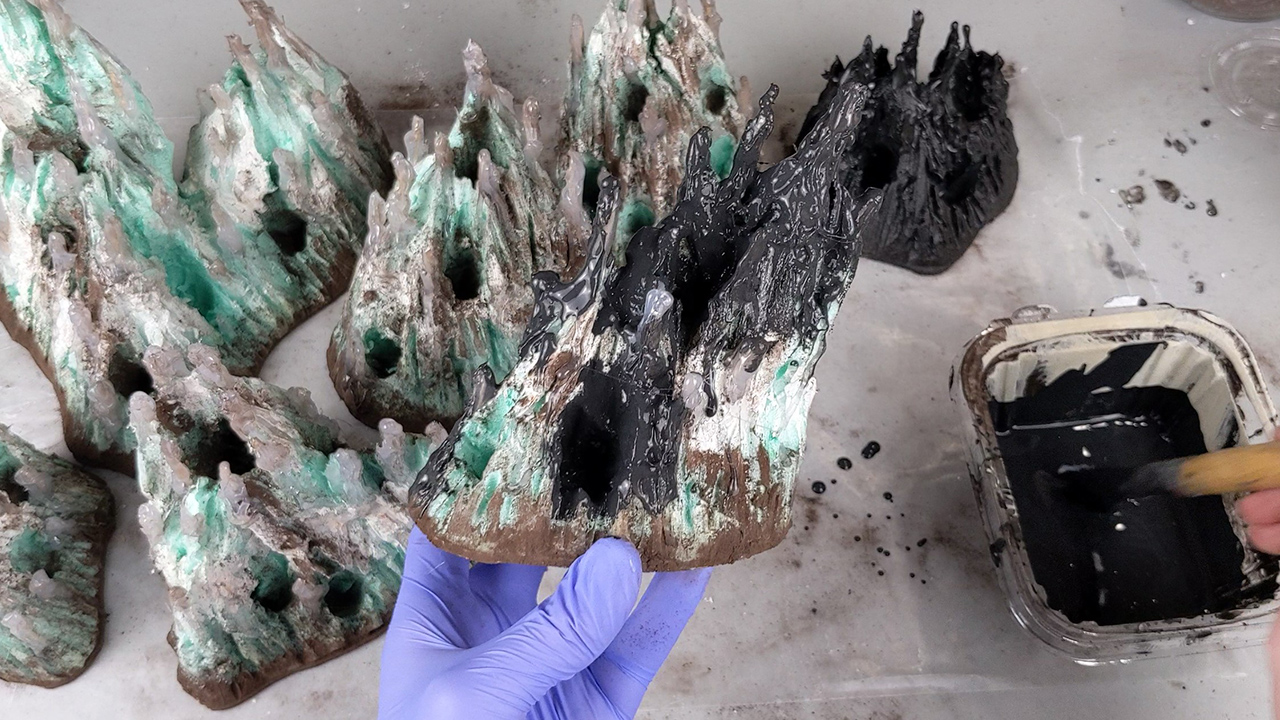
Painting was pretty straight forward. I mixed some cheap black paint with mod podge and covered each node with that.
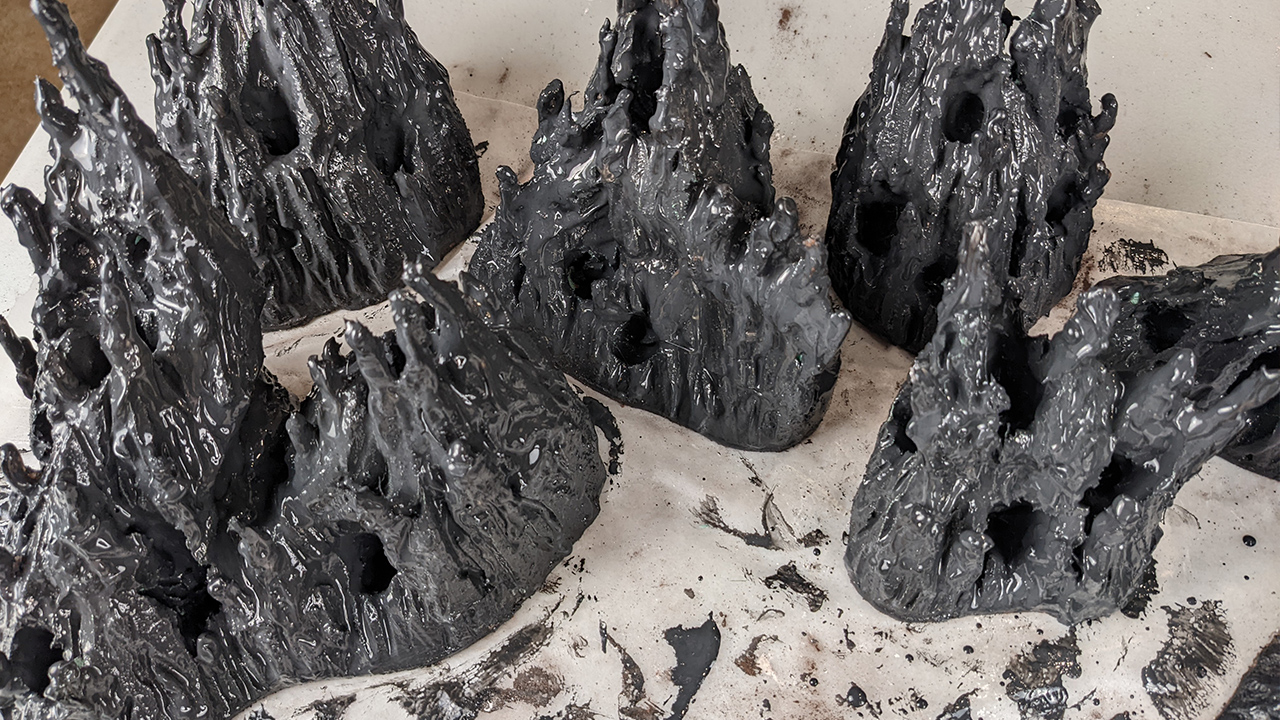
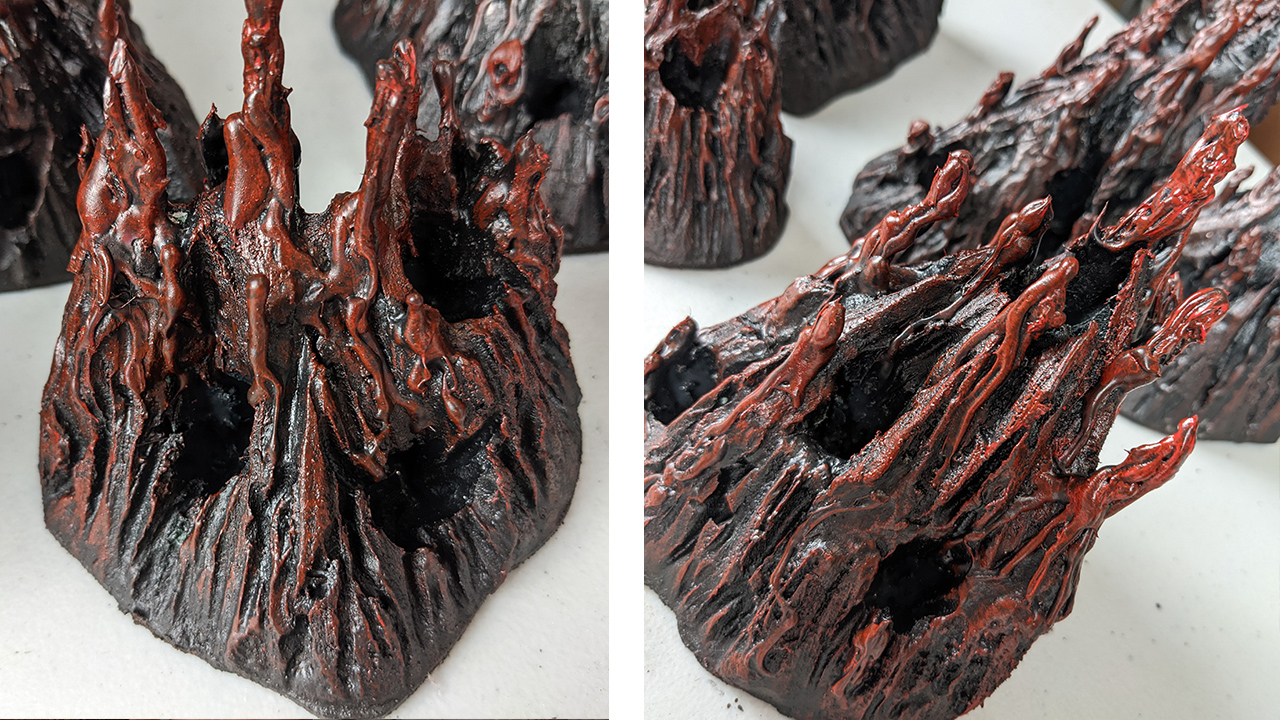
Next I drybrush a mod podge / red paint mixture onto each node. I brushed it on more heavily towards the tops.
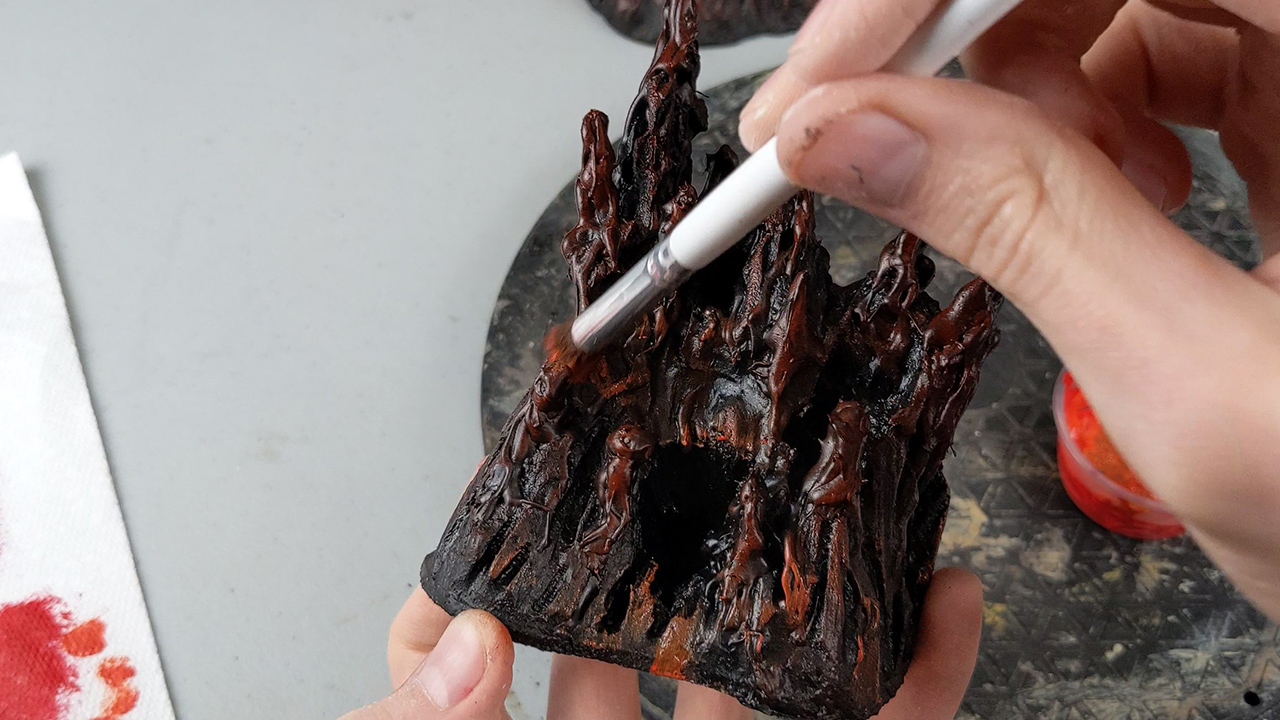
Then I went in with a bit of orange.
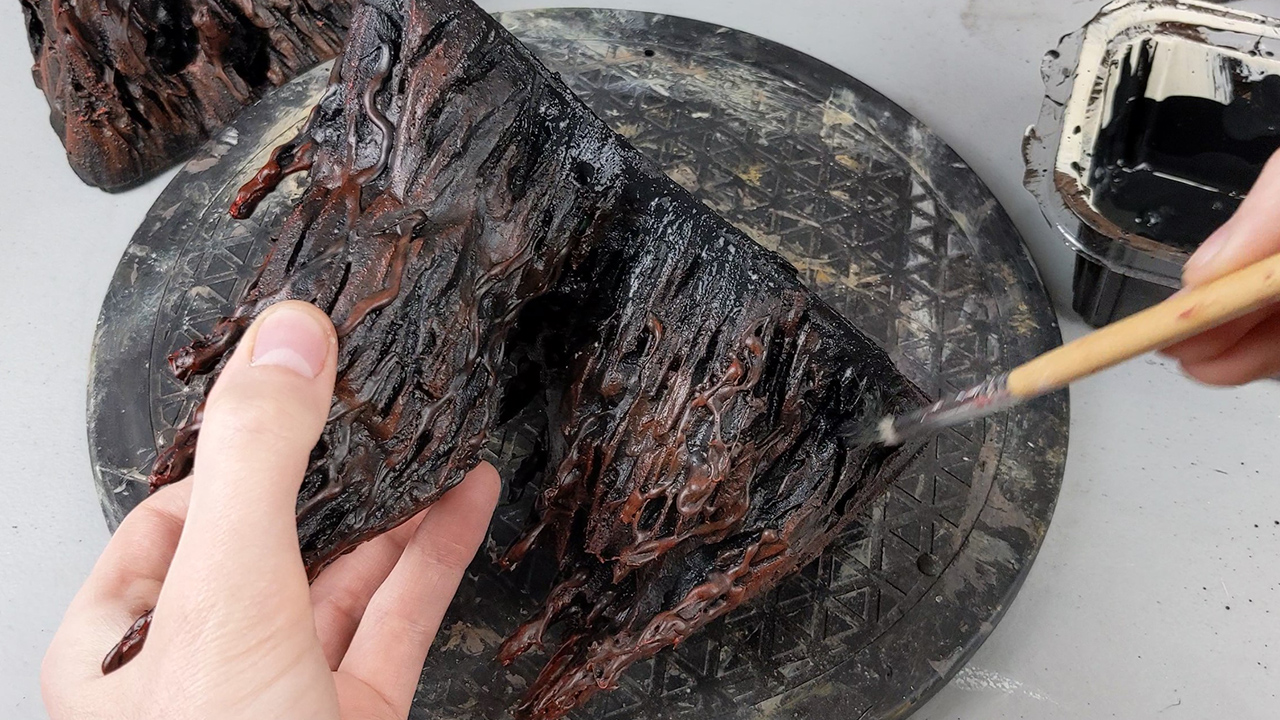
And finally, I went back in with black, around the bottom edge and in the recessed areas.
The Infestation has begun
I gave these Hive Mounds a gloss varnish to really sell the ooze effect!
Here are some pictures of the final product!
Hopefully this inspires you to make some alien terrain of your own!
I had a lot of fun making it. You can see them in being used in my most recent Battle Report! I made up some custom rules for them. It was a fun game!
I hope you enjoyed my tutorial and found it helpful!
FOR MORE IN DEPTH TUTORIALS & PROJECT UPDATES CHECK OUT
SUBSCRIBE to the Haunts’ Wargaming YouTube Channel
I’m also on Instagram and Pinterest if you want to follow me there!
